
Custom Appearance and Application Domain Settings
1. Custom Appearance
You can customize your platform according to your Brand such as: your network name, logo, login logo, web title, favicon and so on.
1.1 Network Name:
Go to “Setup > Settings > General Settings” and set Network Name as below:

(Figure 1: Set Network Name)
Changing the Network Name will affect below information:
(1)When you have not set any Network logo, login logo, or web title in system, network name will appear as “Network” by default in the settings.
(2)When you send emails through system, the network name will display in the “Signature”.
1.2 Network Logo:
Go to “Setup > Settings > Custom Appearance” and set Network Logo as below:

(Figure 2: Set Network Logo)
Setting Network Logo will affect below information:
(1)Network Logo as your brand identity, all roles in your network such as Employee, Affiliate, and Admin, when they log in used their own account, they will see the logo on the upper left corner in the system.

(Figure 3: Network Logo displays on the upper left corner in the interface of each role)
(2)When affiliates sign up by themselves in your sign up page, they also can see the logo.

(Figure 4: Logo display in Affiliates sign up page)
1.3 Login Logo:
Go to “Setup> Settings> Custom Appearance” and set Login Logo as below:
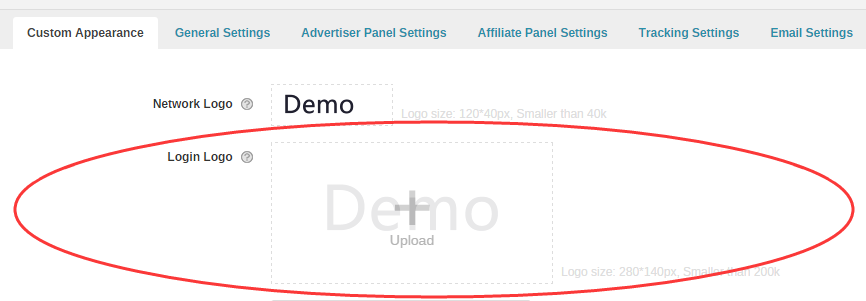
(Figure 5: Set Login Logo)
When you finished the setting of Login logo, all roles such as Employee, Affiliate, and Admin, when they access the login in webpage, the login logo will display.
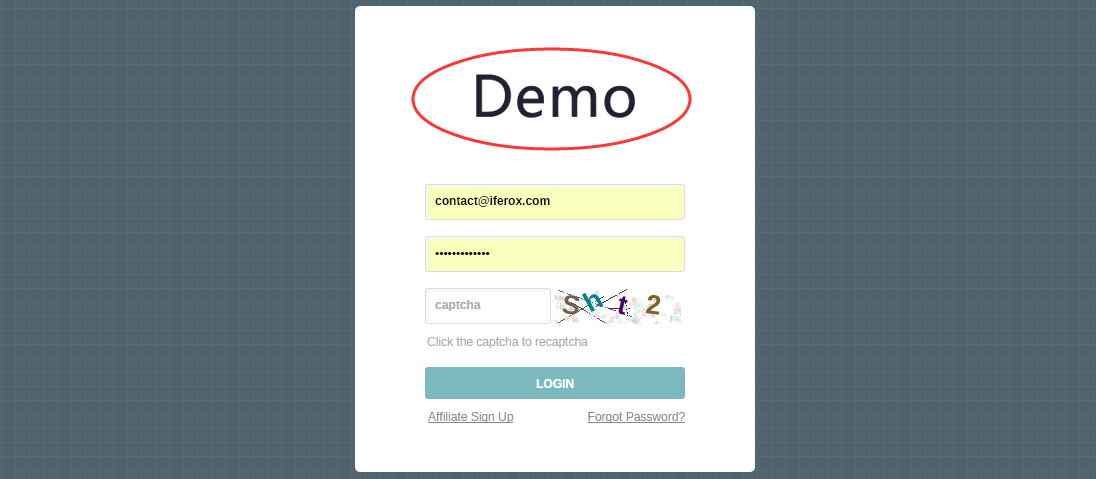
(Figure 6: Login logo displays on the login web page)
1.4 Web Page Title (Customize Title):
Go to “Setup > Settings > Custom Appearance” and set Customize Title as below:

(Figure 7: Set web page title)
When you finished the setting of customize title, all roles such as Employee, Affiliate, and Admin, when they are opening this webpage, the title will display as below:

(Figure 8: Title displays on the web tag)
1.5 Favicon:
Go to “Setup > Settings > Custom Appearance” and set Customize Favicon as below:

(Figure 9: Set Favicon)
When you finished the setting of customize favicon, all roles such as Employee, Affiliate, and Admin, when they are opening this webpage, the favicon will display as below:

(Figure 10: Favicon displays on the web tag)
2. Domain Settings
You can customize your own Application Domain and Tracking Domain in system.
2.1 Application Domain:
When all roles are accessing system by their own account, the Application Domain will display in the web address. After you logged in, you can check Application Domain in “Setup > Settings > General Settings” as below:
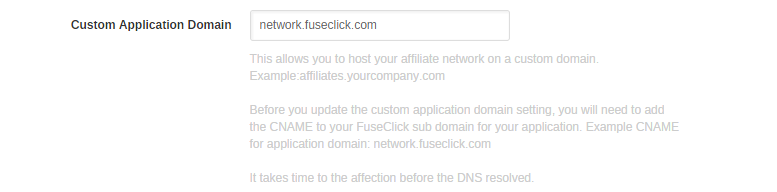
(Figure 11: Set Application Domain)
If you want to set the new Application Domain, please make sure you have already done domain resolution to the default Application Domain which is created by FuseClick system, in your domain service. Please make sure you used CNAME to do domain resolution.
Suggestion: after changed new domain, please supply the new domain to the roles in system such as Employees, Affiliates by email.
You can customize your platform according to your Brand such as: your network name, logo, login logo, web title, favicon and so on.
1.1 Network Name:
Go to “Setup > Settings > General Settings” and set Network Name as below:
(Figure 1: Set Network Name)
Changing the Network Name will affect below information:
(1)When you have not set any Network logo, login logo, or web title in system, network name will appear as “Network” by default in the settings.
(2)When you send emails through system, the network name will display in the “Signature”.
1.2 Network Logo:
Go to “Setup > Settings > Custom Appearance” and set Network Logo as below:
(Figure 2: Set Network Logo)
Setting Network Logo will affect below information:
(1)Network Logo as your brand identity, all roles in your network such as Employee, Affiliate, and Admin, when they log in used their own account, they will see the logo on the upper left corner in the system.
(Figure 3: Network Logo displays on the upper left corner in the interface of each role)
(2)When affiliates sign up by themselves in your sign up page, they also can see the logo.
(Figure 4: Logo display in Affiliates sign up page)
1.3 Login Logo:
Go to “Setup> Settings> Custom Appearance” and set Login Logo as below:
(Figure 5: Set Login Logo)
(Figure 6: Login logo displays on the login web page)
Go to “Setup > Settings > Custom Appearance” and set Customize Title as below:
(Figure 7: Set web page title)
When you finished the setting of customize title, all roles such as Employee, Affiliate, and Admin, when they are opening this webpage, the title will display as below:
(Figure 8: Title displays on the web tag)
Go to “Setup > Settings > Custom Appearance” and set Customize Favicon as below:
(Figure 9: Set Favicon)
When you finished the setting of customize favicon, all roles such as Employee, Affiliate, and Admin, when they are opening this webpage, the favicon will display as below:
(Figure 10: Favicon displays on the web tag)
2. Domain Settings
You can customize your own Application Domain and Tracking Domain in system.
2.1 Application Domain:
When all roles are accessing system by their own account, the Application Domain will display in the web address. After you logged in, you can check Application Domain in “Setup > Settings > General Settings” as below:
(Figure 11: Set Application Domain)
If you want to set the new Application Domain, please make sure you have already done domain resolution to the default Application Domain which is created by FuseClick system, in your domain service. Please make sure you used CNAME to do domain resolution.
Suggestion: after changed new domain, please supply the new domain to the roles in system such as Employees, Affiliates by email.
Close All
Getting Started
Anti-Fraud System
Auto
Configuration Guide
Integration with FuseClick
Partner Integration with FuseClick
Employees
Advertisers
Offers
Affiliates
Campaigns
Reports
Billings
Tools
Test
Setup


