
Affiliate Billing
Affiliate Billing is a FuseClick’s feature to manage invoices for Affiliates.
1. Create Invoices for Affiliate
(1)Create Invoice Manually
When you want to create invoices for one affiliate manually, just click “Create Invoices” in “Billing>Affiliate Billing” page.

(Figure1: Create Invoices)
A. Select the affiliate account you want to create an invoice for, and then set the time range for a billing period.
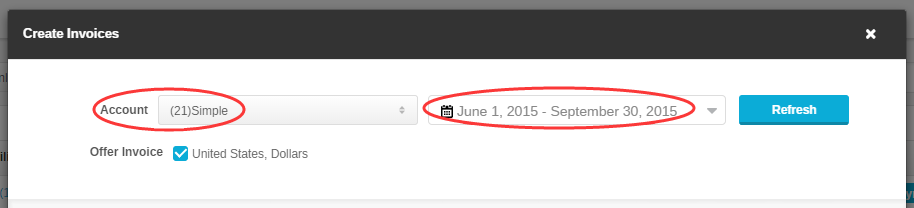
(Figure 2: Select an Affiliate and set time range)
B. Click “Refresh” to get the currency options of available conversion records. Conversion list will be generated in a pre-gen invoice after currency options check. There is one pre-gen invoice for each currency option. Conversion list has a detail information of each conversion including Offer, Event, Payout Type and so on. You can also edit the records:
I. Delete the conversion records from the list to remove them from the invoice.
II. Create or remove Adjustment items if you want to add additional rewards or deductions for the affiliate.
III. Add note for this invoice.
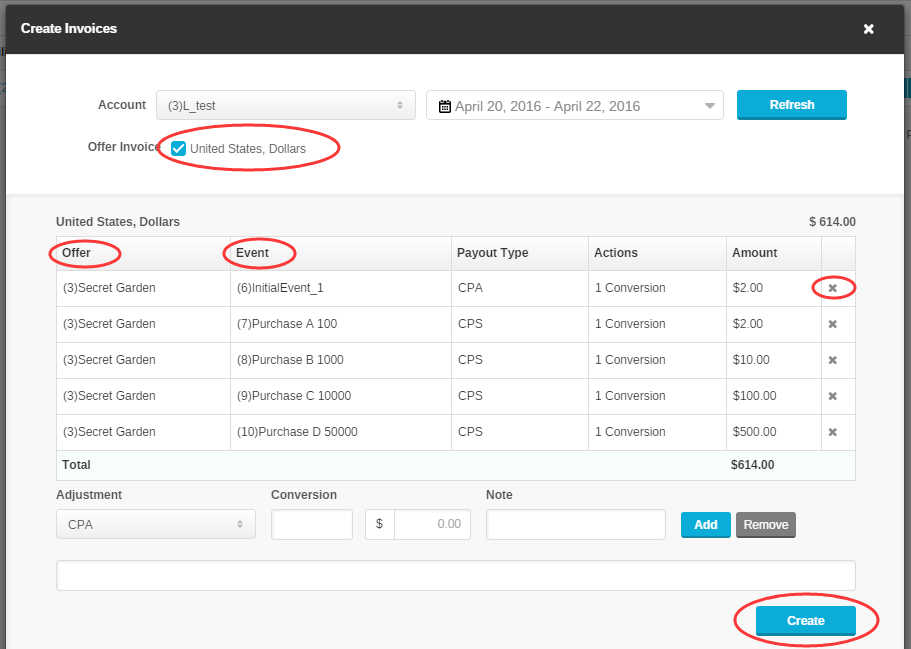
(Figure 3: Check the Currency to pre-generate invoices)
C. Click “Create” to create a new invoice for all amounts in the pre-gen invoice. Once invoice is created and invoice number is generated, you can click “Cancel Invoice” to cancel the invoice or go back to Billing Page.

(Figure 4: Cancel the invoice by clicking “Cancel Invoice”)
(2)Batch Generate Invoices
This function is the most relevant for networks who want to generate invoice for affiliate, based on a specific Invoice Frequency. For example, if you want to generate invoice for affiliate whose Invoice Frequency is “Weekly” and the invoice date range is before 06/10/2015, then the system will generate weekly invoices before the last Sunday preceding the final date you set.
Please Note that:
A. If there are conversions has not been included in last invoice, then these conversions will be included in next invoice. The start time of the invoice will be determined by first conversion.
B. When you using Bath Generate Invoices, the sum of each individual invoice should not be less than a Minimum Invoice Threshold in “Setup>Setting>Affiliate Panel Setting”, otherwise the system will not generate invoice.
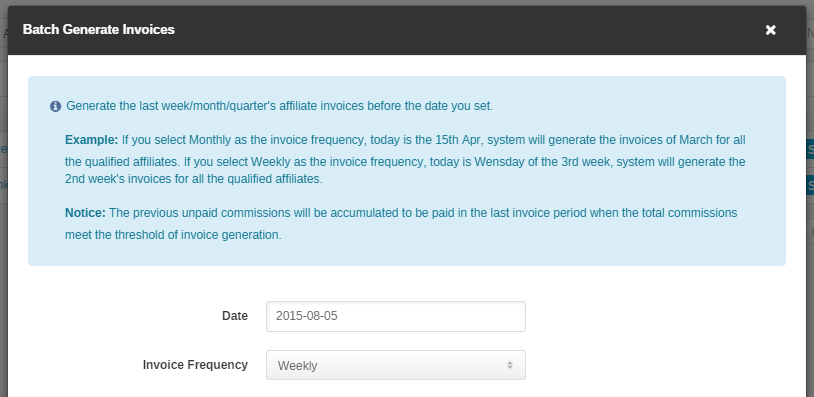
(Figure 5: Batch Generate Invoices)
2. Payment Status
Every invoice has 3 basic payment statuses: Created – Pending – Paid.

(Figure 6: Payment Status)
(1)Invoice can be hold as long as it is in the stage of Created or Pending. There are some default reasons for holding.

(Figure 7: Hold an invoice)
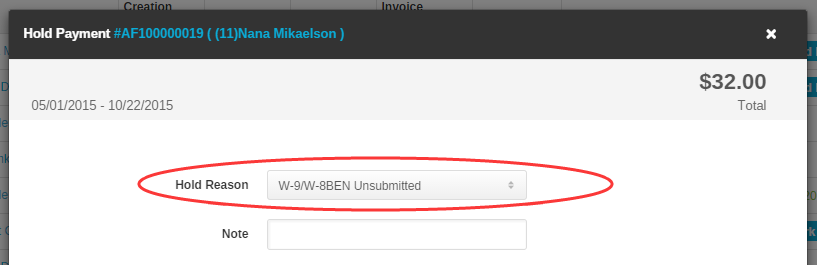
(Figure 8: Choose a Hold Reason and add Note)
(2)You can cancel an invoice at any time before it is marked as paid.

(Figure 9: Cancel an Invoice)
(3)You can review the whole payment history in History window.

(Figure 10: Review the History of an invoice)
(4)You can mark multiple invoices of one affiliate as Paid at the same time by using “Mark as Paid”.

(Figure 11: Mark multiple invoices of one affiliate as Paid)
3. Edit Invoice
You can edit invoice by clicking “Adjust”.
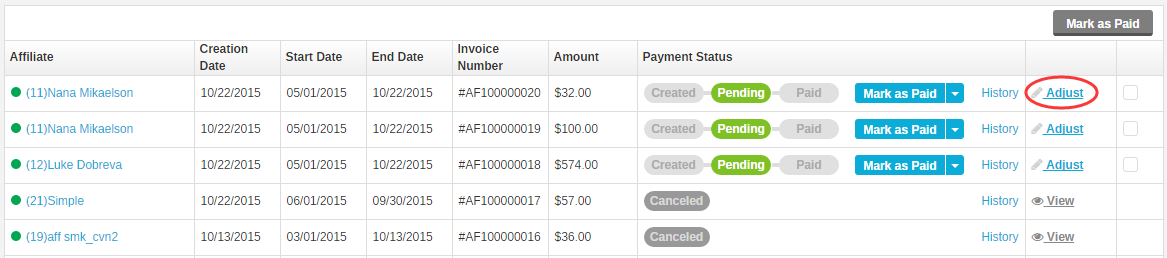
(Figure 12: Click Adjust to adjust the invoice)
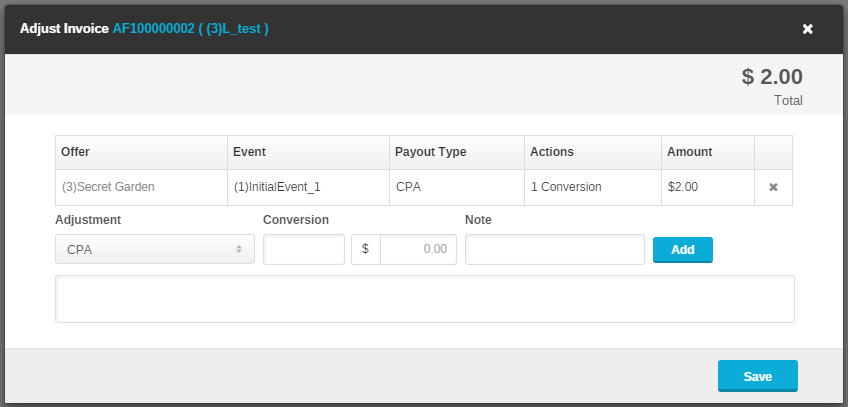
(Figure 13: Adjust the Invoice detail)
4. Manage Affiliate Invoices
You can manage all invoices in “Billing>Affiliate Billing” page. All information about invoices including Affiliate, Creation Date, Start Date, End Date, Invoice Number, Amount, Payment Status and History.
The filter contains options “Affiliate Status”, “Invoice Status”, “Payment Method”, “Payment Period”, “Affiliate Name” and “Invoice Number” for fuzzy searching.
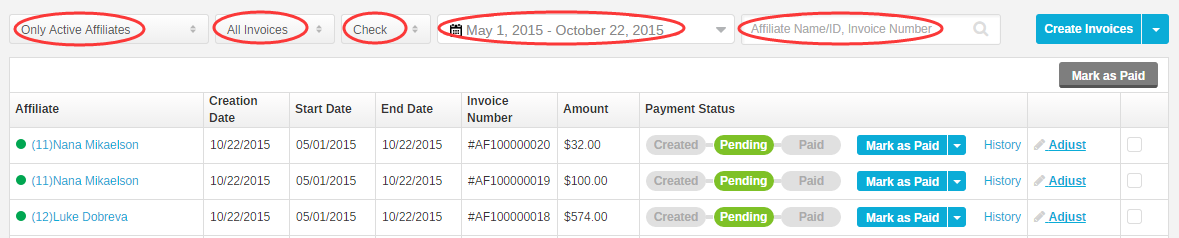
(Figure 14: Manage Invoices)
5. Manage invoices of an Affiliate
Click affiliate’s name in the invoice list to manage all invoices of this affiliate.

(Figure 15: Manage Invoices of an Affiliate)
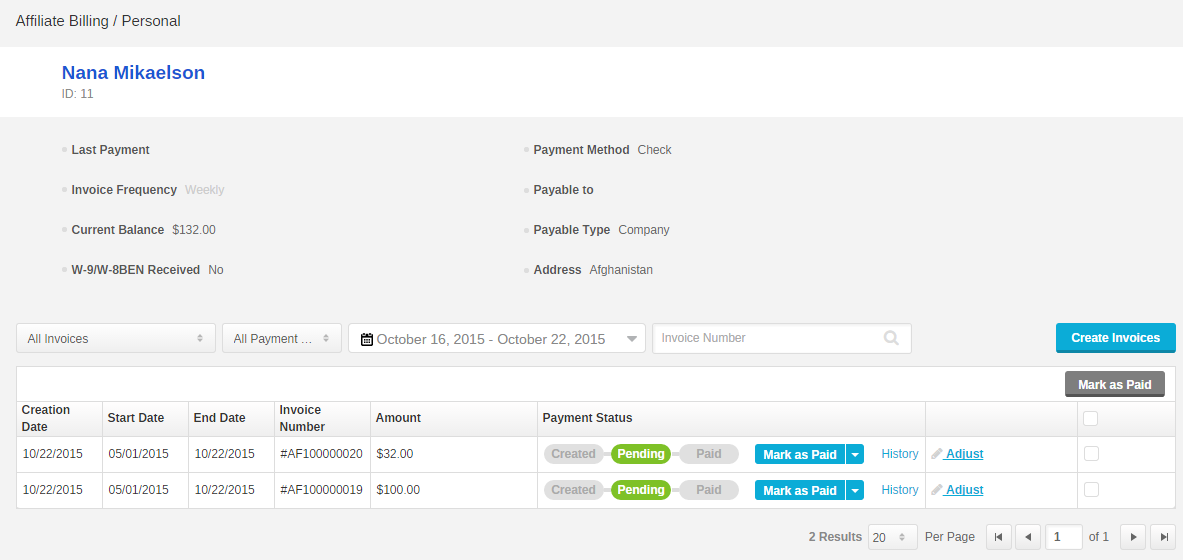
(Figure 16: View Invoices of an Affiliate)
(Figure 17)
(Figure 18)
1. Create Invoices for Affiliate
(1)Create Invoice Manually
When you want to create invoices for one affiliate manually, just click “Create Invoices” in “Billing>Affiliate Billing” page.
(Figure1: Create Invoices)
A. Select the affiliate account you want to create an invoice for, and then set the time range for a billing period.
(Figure 2: Select an Affiliate and set time range)
B. Click “Refresh” to get the currency options of available conversion records. Conversion list will be generated in a pre-gen invoice after currency options check. There is one pre-gen invoice for each currency option. Conversion list has a detail information of each conversion including Offer, Event, Payout Type and so on. You can also edit the records:
I. Delete the conversion records from the list to remove them from the invoice.
II. Create or remove Adjustment items if you want to add additional rewards or deductions for the affiliate.
III. Add note for this invoice.
(Figure 3: Check the Currency to pre-generate invoices)
C. Click “Create” to create a new invoice for all amounts in the pre-gen invoice. Once invoice is created and invoice number is generated, you can click “Cancel Invoice” to cancel the invoice or go back to Billing Page.
(Figure 4: Cancel the invoice by clicking “Cancel Invoice”)
This function is the most relevant for networks who want to generate invoice for affiliate, based on a specific Invoice Frequency. For example, if you want to generate invoice for affiliate whose Invoice Frequency is “Weekly” and the invoice date range is before 06/10/2015, then the system will generate weekly invoices before the last Sunday preceding the final date you set.
Please Note that:
A. If there are conversions has not been included in last invoice, then these conversions will be included in next invoice. The start time of the invoice will be determined by first conversion.
B. When you using Bath Generate Invoices, the sum of each individual invoice should not be less than a Minimum Invoice Threshold in “Setup>Setting>Affiliate Panel Setting”, otherwise the system will not generate invoice.
(Figure 5: Batch Generate Invoices)
Every invoice has 3 basic payment statuses: Created – Pending – Paid.
(Figure 6: Payment Status)
(1)Invoice can be hold as long as it is in the stage of Created or Pending. There are some default reasons for holding.
(Figure 7: Hold an invoice)
(Figure 8: Choose a Hold Reason and add Note)
(2)You can cancel an invoice at any time before it is marked as paid.
(Figure 9: Cancel an Invoice)
(3)You can review the whole payment history in History window.
(Figure 10: Review the History of an invoice)
(4)You can mark multiple invoices of one affiliate as Paid at the same time by using “Mark as Paid”.
(Figure 11: Mark multiple invoices of one affiliate as Paid)
3. Edit Invoice
You can edit invoice by clicking “Adjust”.
(Figure 12: Click Adjust to adjust the invoice)
(Figure 13: Adjust the Invoice detail)
4. Manage Affiliate Invoices
You can manage all invoices in “Billing>Affiliate Billing” page. All information about invoices including Affiliate, Creation Date, Start Date, End Date, Invoice Number, Amount, Payment Status and History.
The filter contains options “Affiliate Status”, “Invoice Status”, “Payment Method”, “Payment Period”, “Affiliate Name” and “Invoice Number” for fuzzy searching.
(Figure 14: Manage Invoices)
Click affiliate’s name in the invoice list to manage all invoices of this affiliate.
(Figure 15: Manage Invoices of an Affiliate)
(Figure 16: View Invoices of an Affiliate)
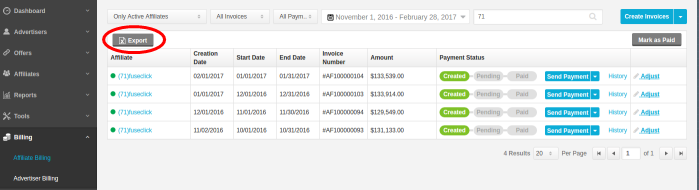
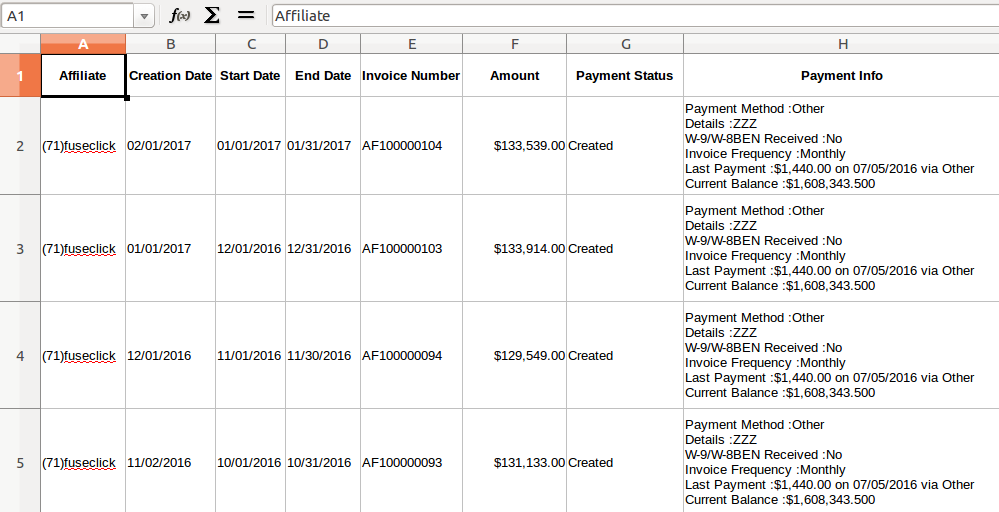
6. Affiliate Invoices Exporting
Export Affiliate Invoices with their billing information.
Export Affiliate Invoices with their billing information.
(Figure 17)
(Figure 18)
Close All
Getting Started
Anti-Fraud System
Auto
SmartLlink
Configuration Guide
Integration with FuseClick
Partner Integration with FuseClick
Employees
Advertisers
Offers
Affiliates
Campaigns
Reports
Billings
Tools
Test
Setup


